The goal of today’s post is to share a few IDE configuration goodies that I think are pretty cool. So, let’s get to it!
Quick Intro:
Spring Boot is an amazing framework and Spring Boot DevTools can really supercharge development by saving oodles of time spent on expensive full rebuild and restart boilerplate when we make simple code changes. If you’re not familiar with DevTools, have a quick read and you’ll want to use it.
Part 1:
Add org.springframework.boot:spring-boot-devtools Without Modifying pom.xml
(1) Fire up IntelliJ and open your project.
(2) Open the Project Structure dialog by clicking File > Project Structure.
Steps:2

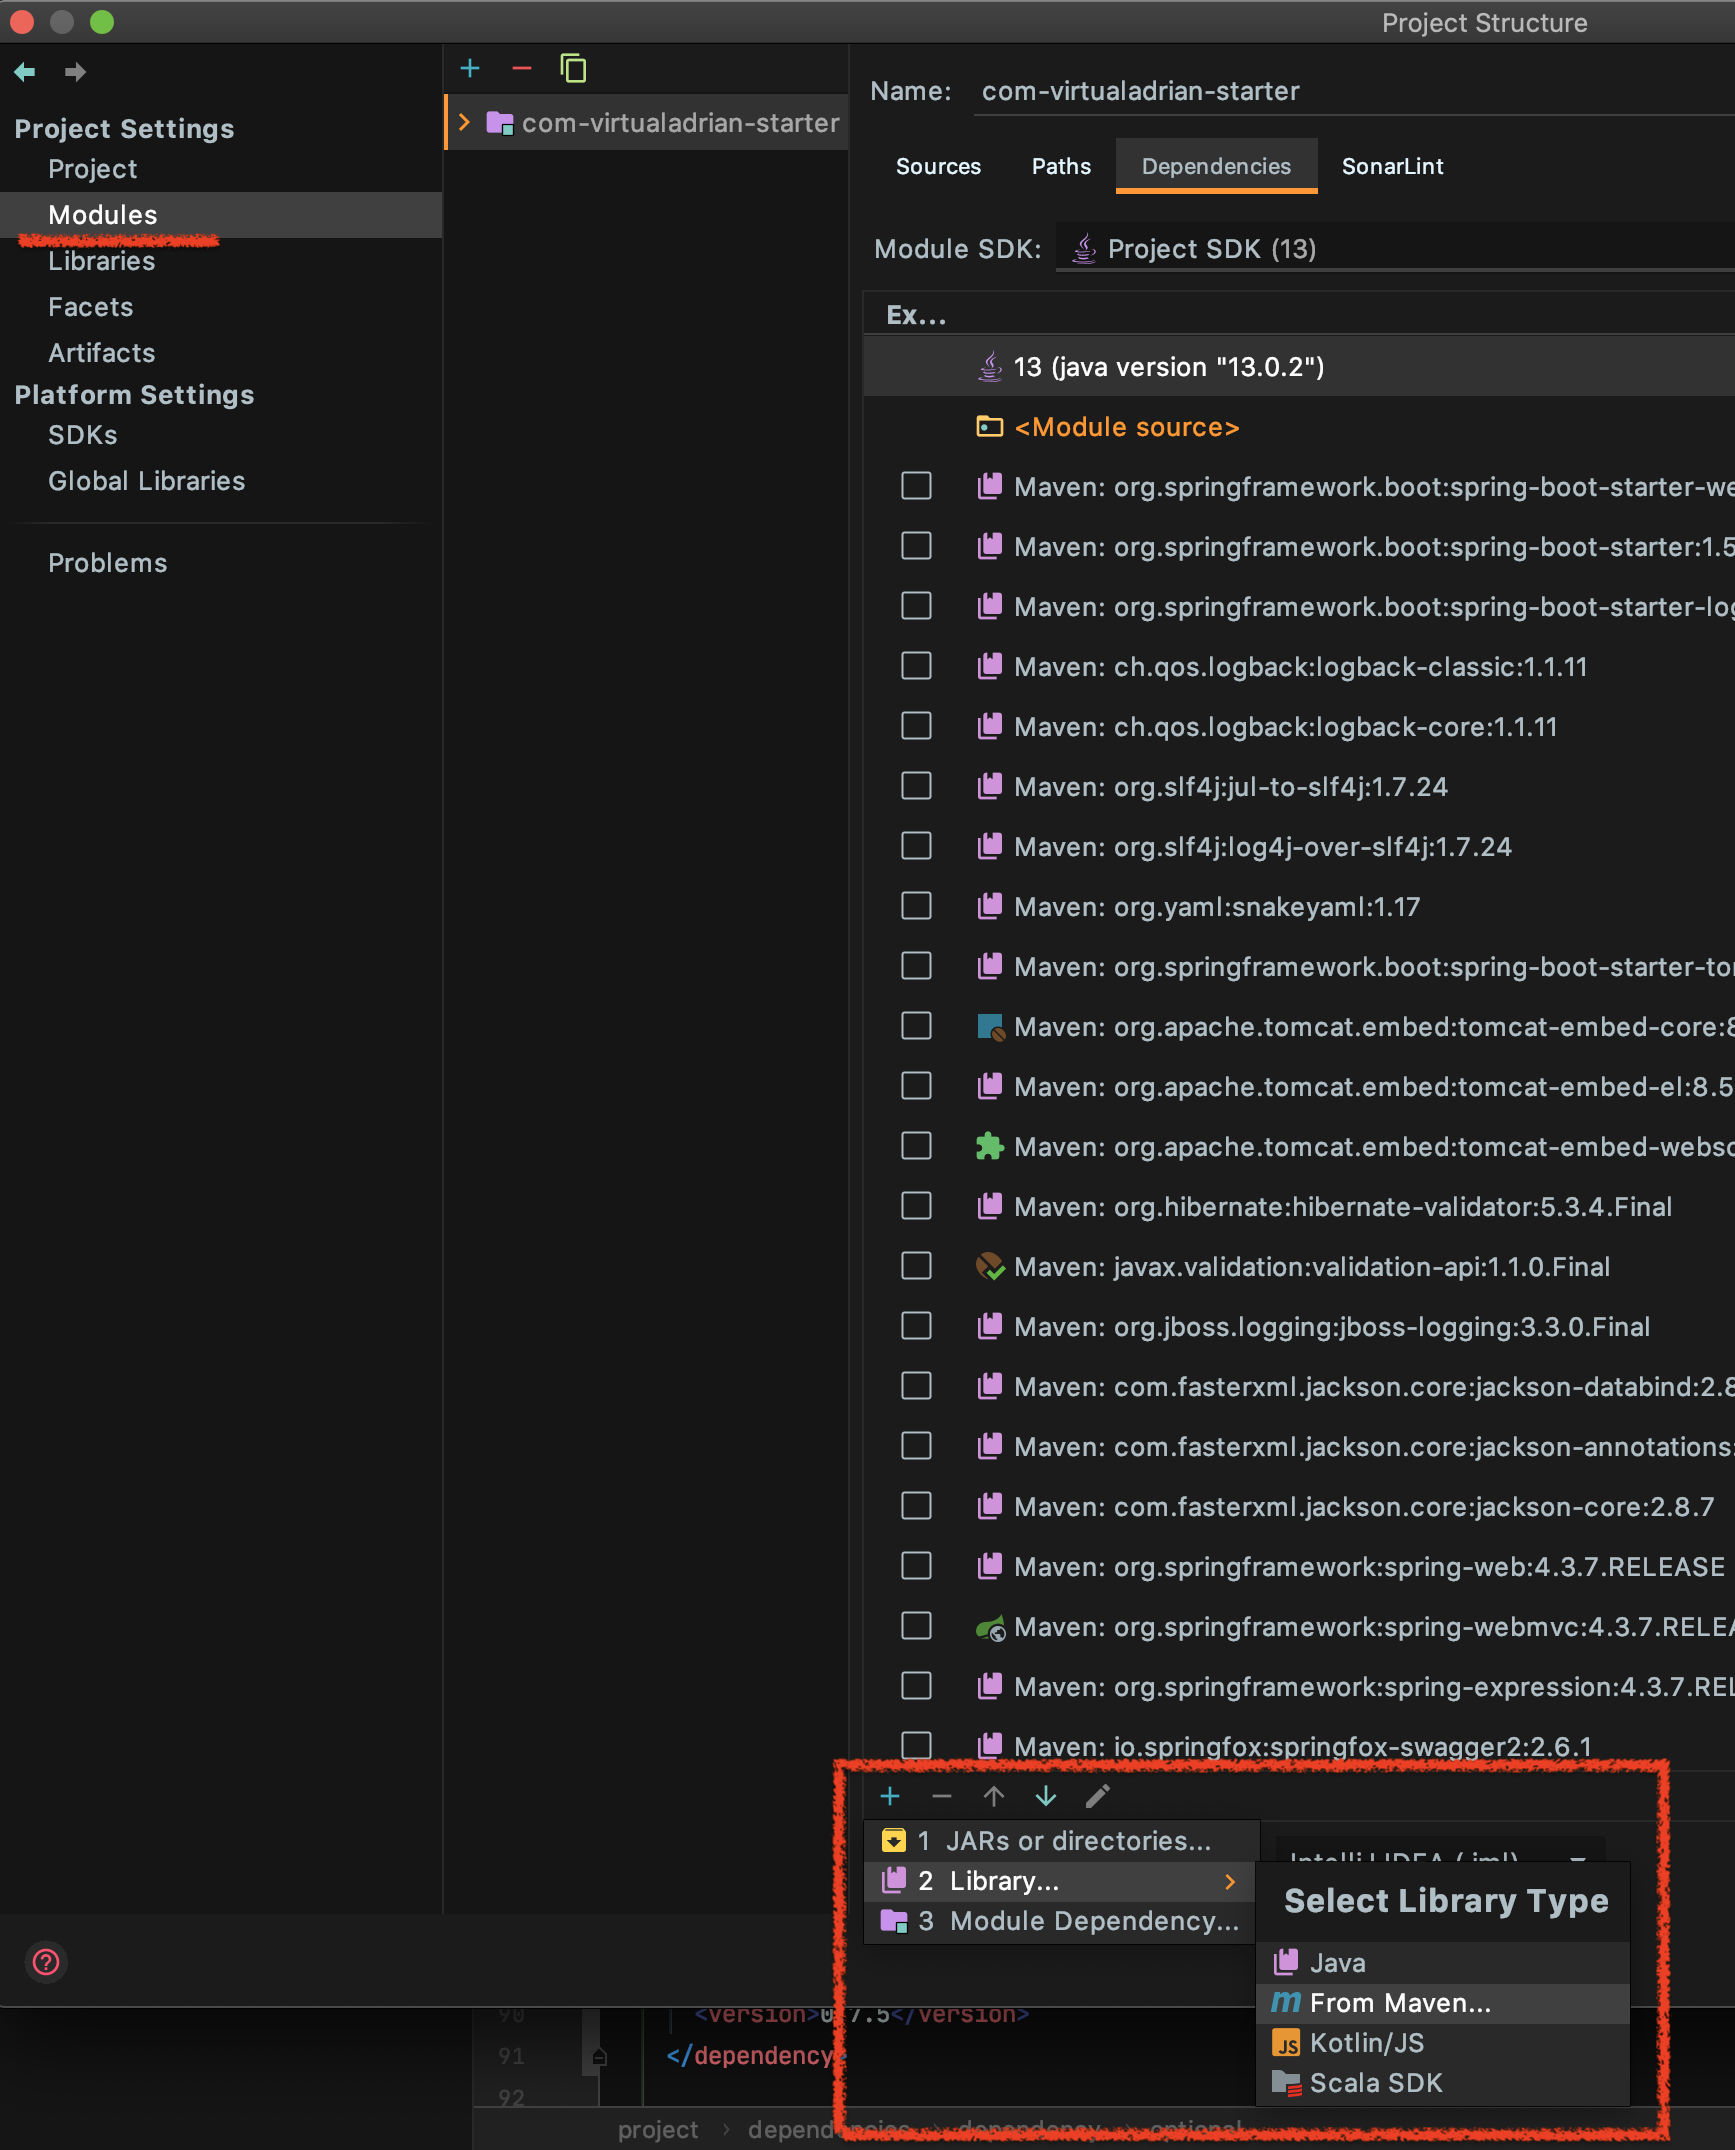
(3) Open the Dependencies configuration by clicking Project Settings > Modules > Dependencies.
(4) Click the small ( + ) button at the bottom of the Dependency list and you’ll see a context menu open allowing you to choose what type of dependency you’d like to add.
(5) To add a local project dependency, click Library > From Maven.
Steps: 3,4,5
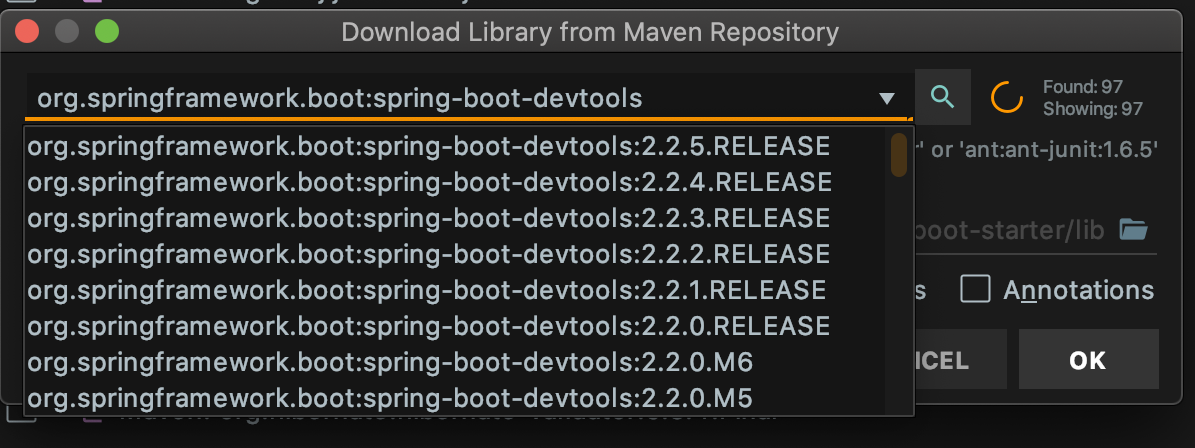
(6) Enter org.springframework.boot:spring-boot-devtools in the search text and hit Enter. IntelliJ will take a few seconds to search Maven and will present you with a list of results.
(7) Choose the version spring-boot-devtools that corresponds with all the other Spring Boot dependencies in your pom file. Click OK once you’ve selected the right version. (The project I used for this blog post is quite old, so I ended up having to pick 1.5.2.RELEASE)
Steps: 6, 7
(8) You should now see a new dependency that looks a little bit different than the rest.
Steps: 8

Part 1 is now complete.
Part 2:
Update IntelliJ Compiler Preferences to Build The Project Automatically
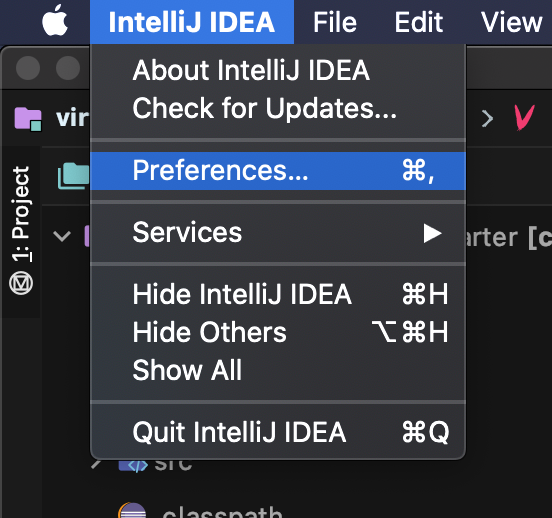
(1) Open the Preferences Dialog by Clicking IntelliJ IDEA > Preferences.
Steps: 1
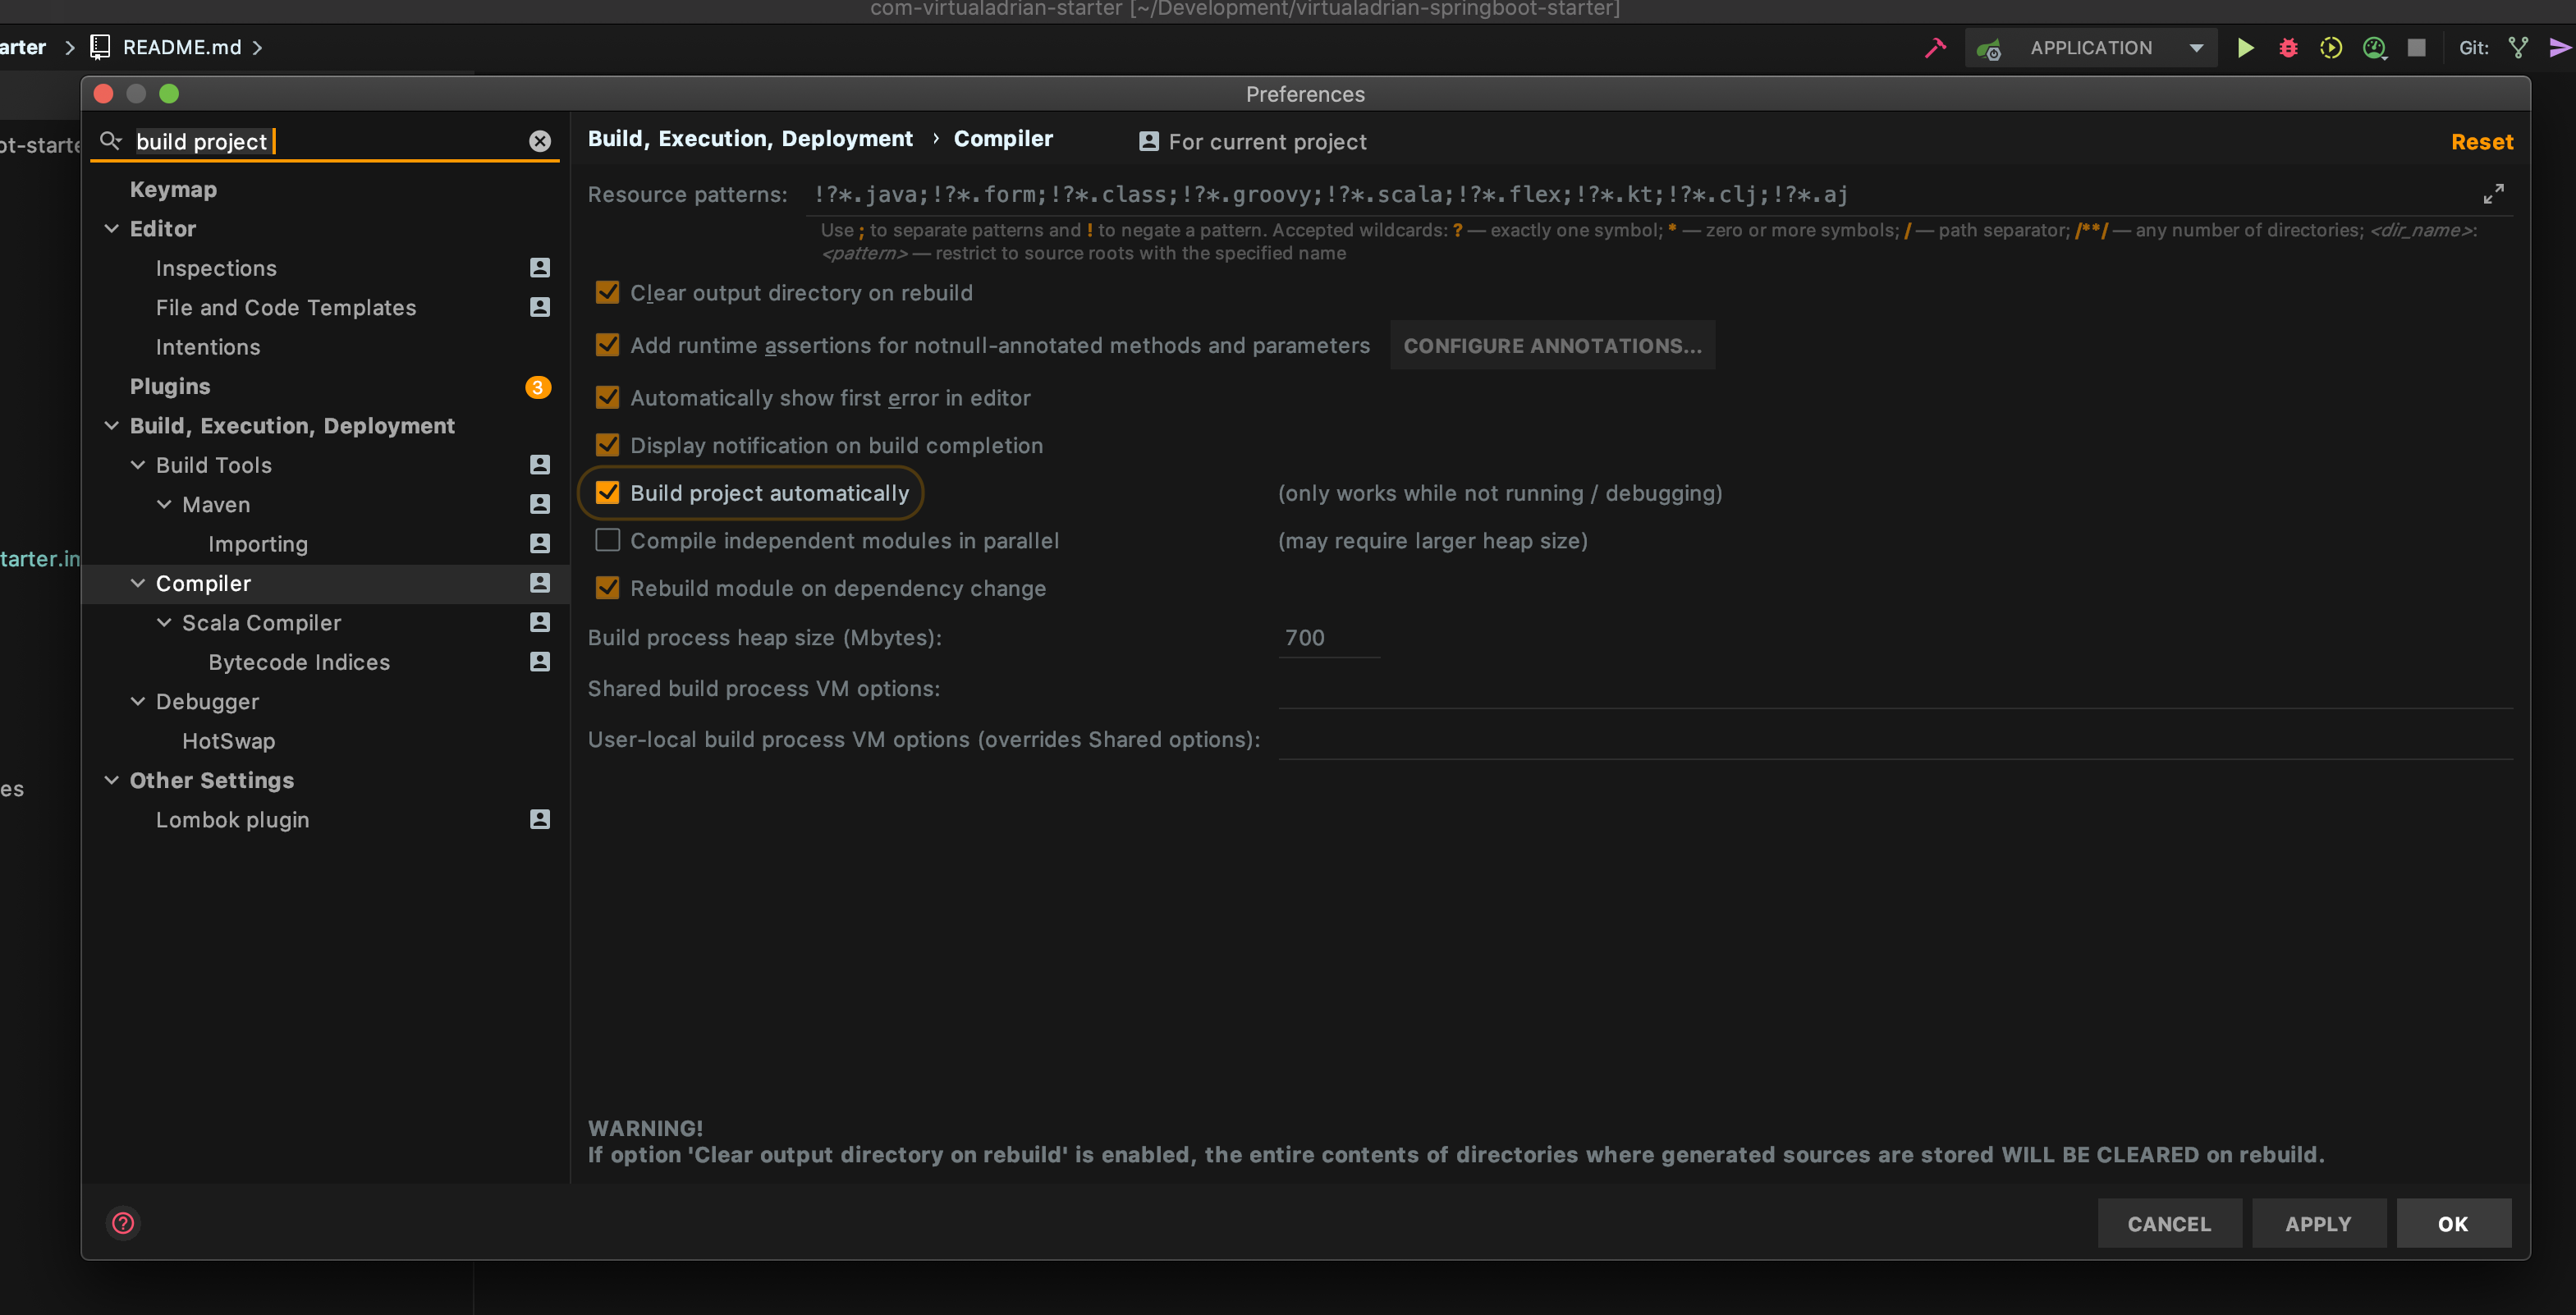
(2) Enter “Build Project” into the search bar and click Build, Execution Deployment > Compiler to open the Compiler section.
(3) Make sure that the Build project automatically checkbox is checked, and click OK.
Steps: 2, 3
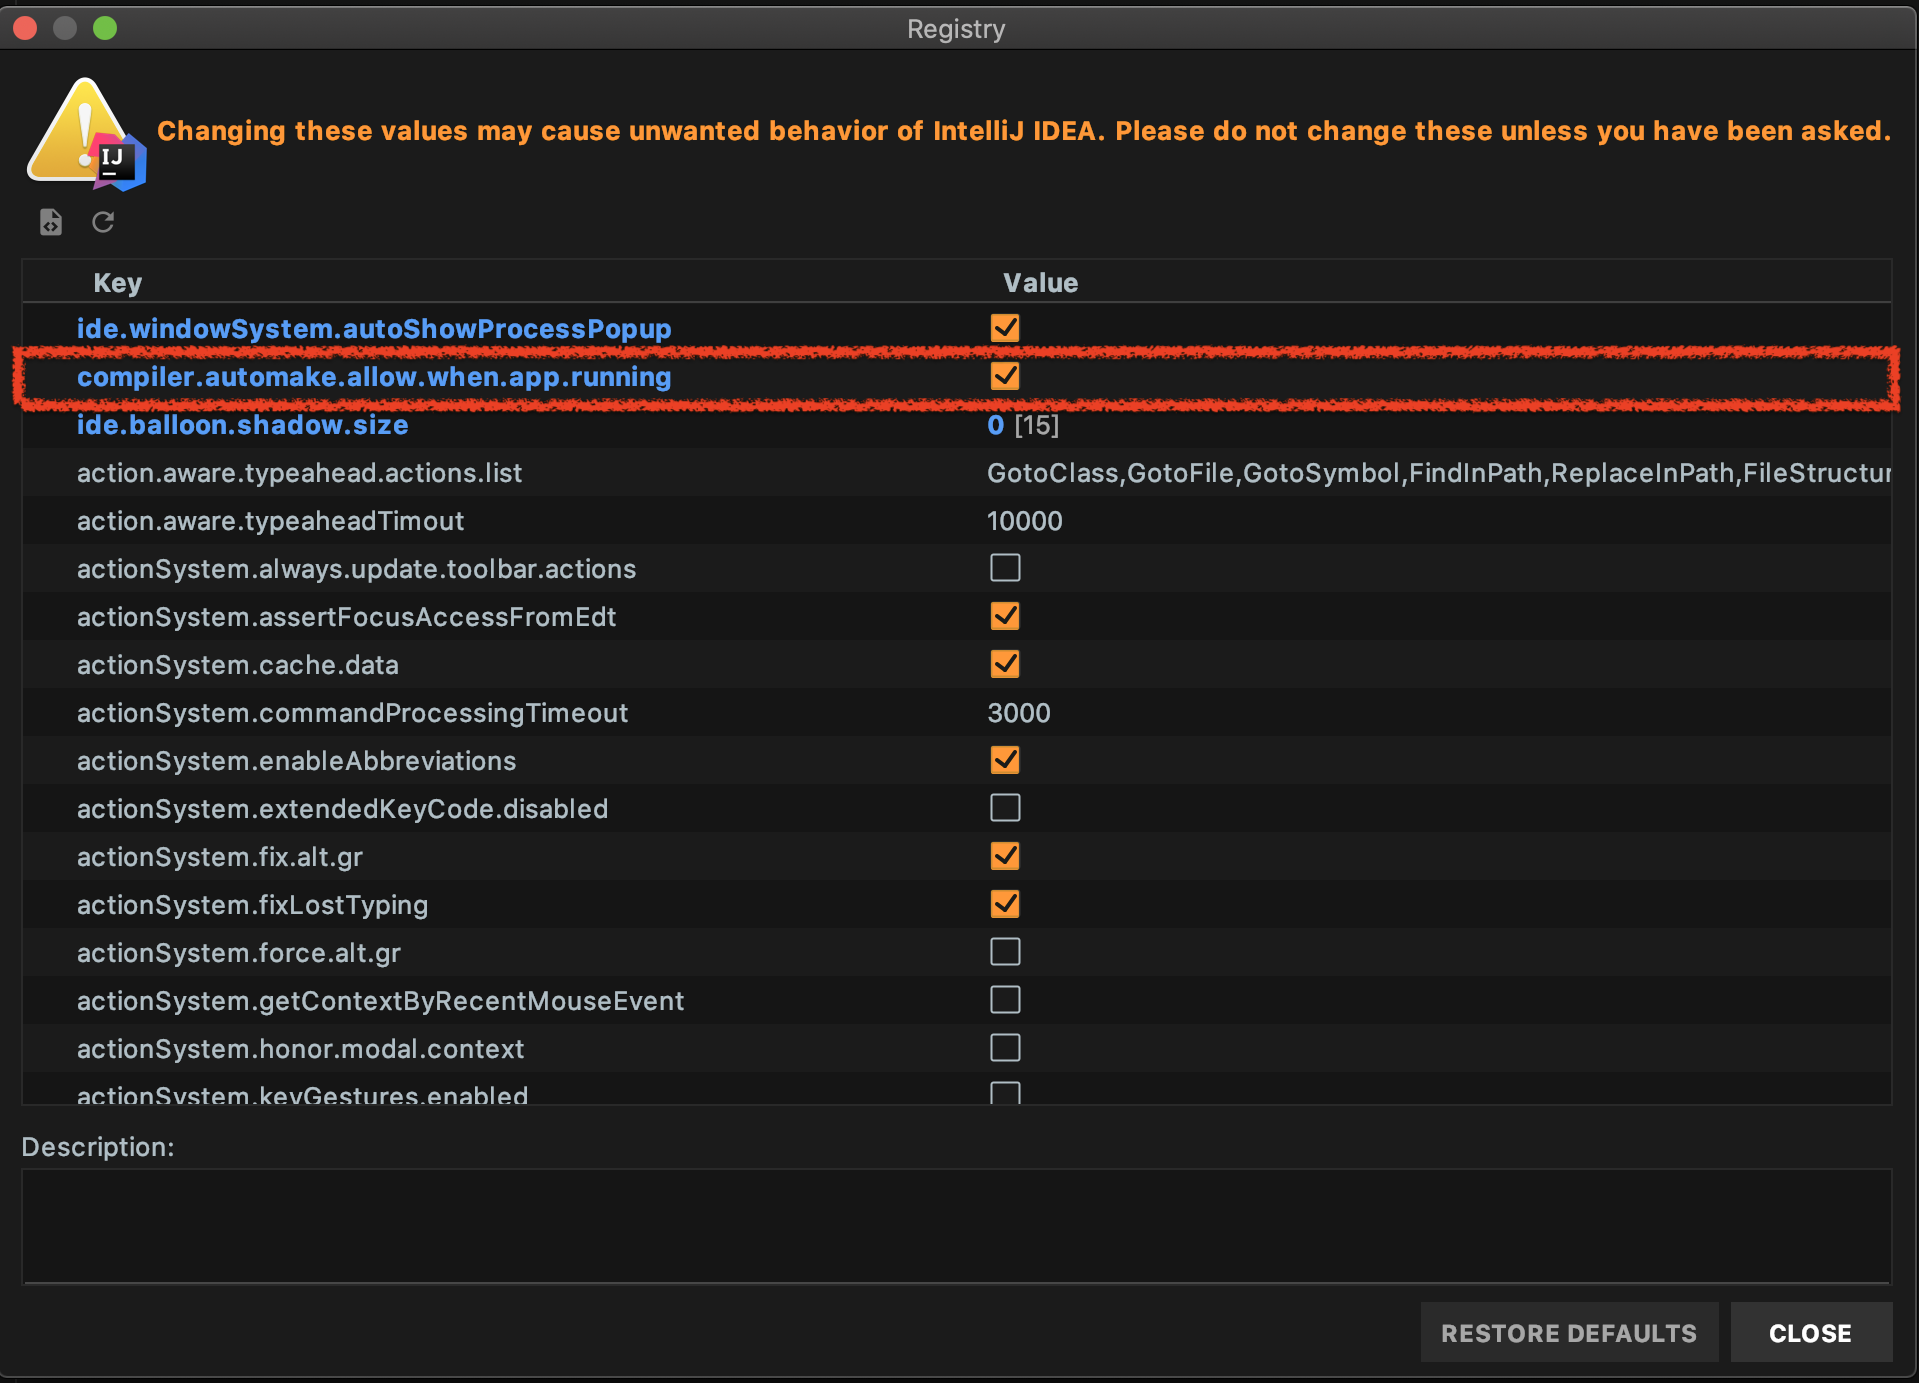
(4) Open the hidden Registry… Settings Dialog by Tapping Shift Twice and typing “Registry…”. Make sure to select the option that has no menu option associated, and has the trailing ellipsis.
(5) Find the compiler.automake.allow.when.app.running setting in the list of registry settings, and make sure that it is Value column is checked.
Steps: 4, 5
Part 2 is now complete.
Part 3:
Update The Run/Debug Configuration For Your Project/Application
(1) Open the Run Configuration Dialog by clicking Run > Edit Configurations…
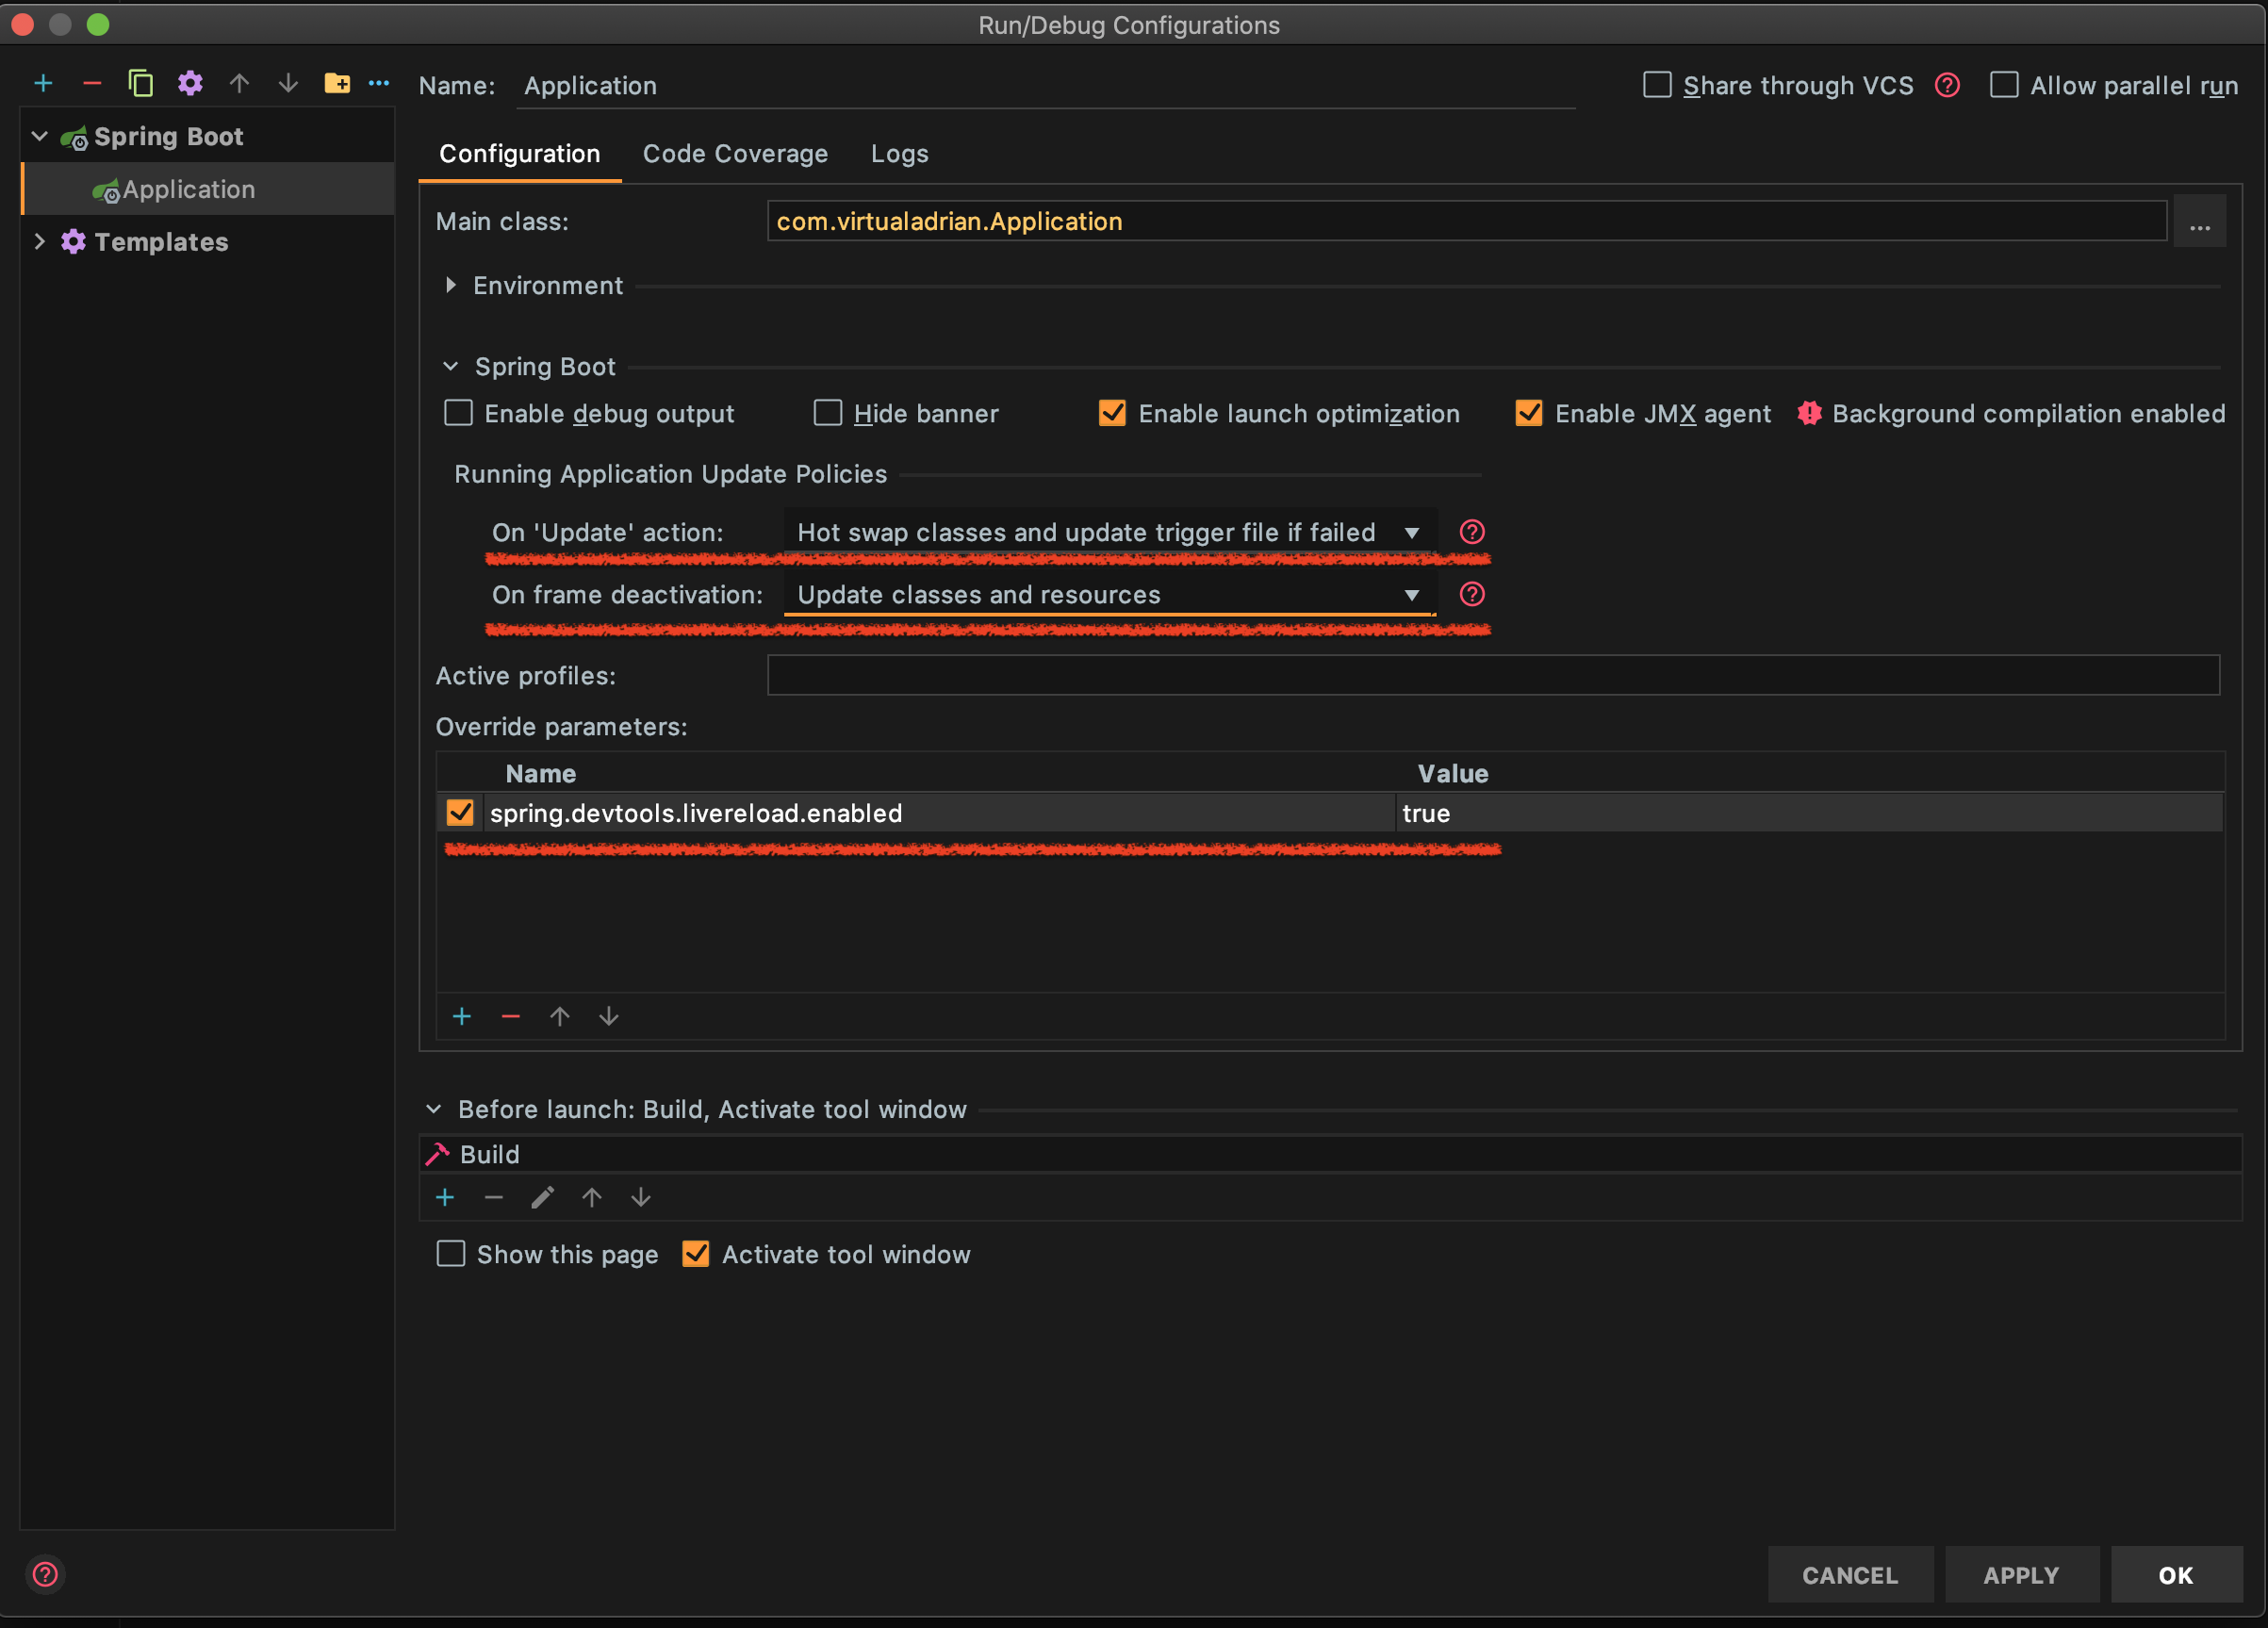
(2) Select the Run/Debug configuration for your application under the Spring Boot section.
(3) Change the setting: On ‘Update’ action to the last item on the list: “Hot swap classes and update trigger file if failed”.
(4) Change the setting: On frame deactivation to the last item on the list: “Update classes and resources”.
(5) Add an Override Parameter to enable live-reload. Click the (+) button and set the Name Column to spring.devtools.livereload.enabled and the Value Column to true.
Steps: 1 - 5
Part 3 is now complete.
Summary
So, what have we accomplished? The short version is:
- Our project has a local dependency for Spring Boot DevTools that won’t interfere with other developers as we didn’t change anything that will make it up to our Git Repo.
- The IntelliJ IDE is now configured to build automatically when we make a change to our Java code and save.
- The Application Run/Debug configuration for our Spring Boot app enables the live reload feature provided by DevTools and only Hot Swaps the classes and resources that we changed.
The end result is that we can make code changes and simply Update instead of restarting the whole application, debugger, and so on. In my case, it took roughly 30 seconds to restart the whole application (I know.. I’m picky), and I’d have to sit there and wait… NO MORE! WE WIN !!!
PS: I’m going to publish this post with very light proofing as it’s likely going to help some folks quite a bit. If you see any mistakes, have questions, or want to say “Hello World”, hit me up on Twitter.